
 BUY NOW AND GET FREE SHIPPING
On all orders over 500,- (DK only)
BUY NOW AND GET FREE SHIPPING
On all orders over 500,- (DK only)
 1-2 DELIVERY DAYS
Order before 12 noon and we will ship the same business day
1-2 DELIVERY DAYS
Order before 12 noon and we will ship the same business day
 14 DAY RETURN RIGHT


Out of stock


Free shipping on orders over 500,- in DK

Ships from Roskilde DK

Local service center in Roskilde

1 year warranty
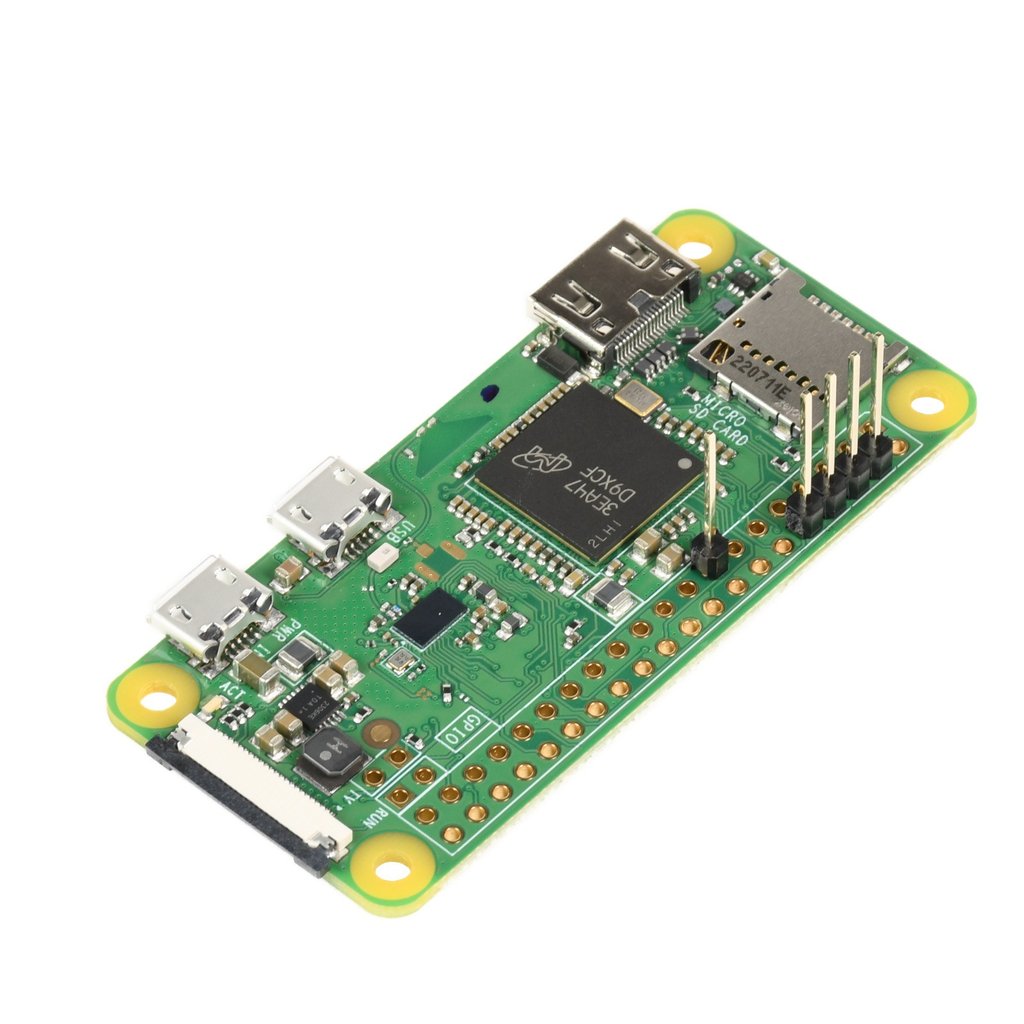
Add PrusaLink functionality to your printer and/or add your printer to Prusa Connect. The Raspberry Pi Zero W allows you to remotely control your 3D printer and connect additional peripherals such as cameras. Our Raspberry Pi Zero comes with an already soldered pin-header, so you can connect it to your printer's motherboard (RAMBo) immediately. Simply install the PrusaLink image on the microSD card (not included), and you can start remotely controlling your printer. Micro SD cards can be purchased here

The Raspberry Pi Zero W is a tiny computer that you can use in your projects in various ways. Specifically, you can connect it directly to your original Prusa MK3/S/+ printer to add PrusaLink / Prusa Connect functionality to it. You can also connect a camera to it, either the RPi camera via the CSI port or a USB camera, using the USB OTG adapter. Aside from being used with our original Prusa printers, the Raspberry Pi Zero W can serve as an inexpensive and energy-efficient computer, featuring 512 MB RAM, built-in wireless connectivity, Bluetooth 4.1, and a micro-USB OTG port.

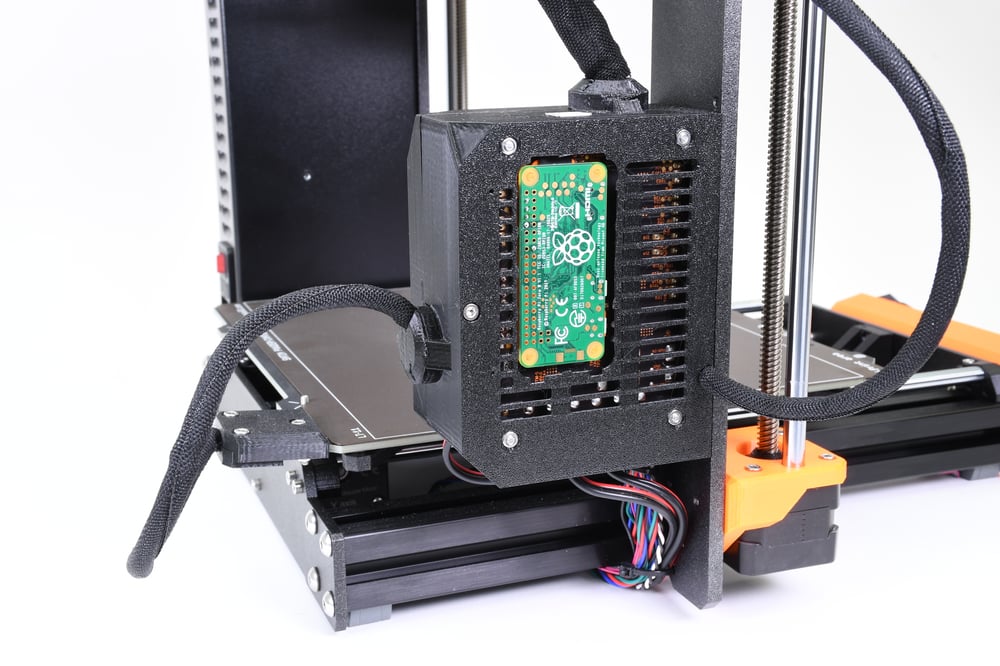
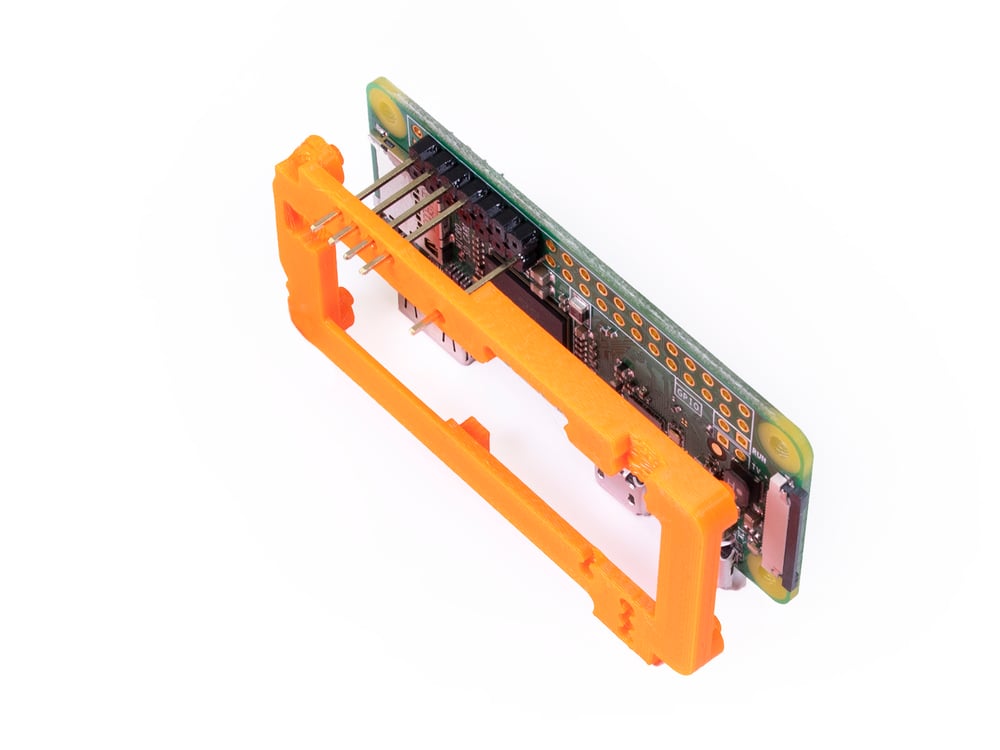
Prepare your printed parts before installation. You need to print the Raspberry Pi Zero Frame to ensure proper alignment and secure installation. Printed parts are not included in the package, and the latest versions are always available on Printables.com.
The entire installation process of Prusalink / Prusa Connect for your MK3/S/+ with Raspberry Pi Zero W is thoroughly explained in our knowledge base. After successful setup of PrusaLink / Prusa Connect, you can install a camera according to this guide.
This product includes:
Raspberry Pi Zero W with 5 soldered pins (1 pc)