
 BUY NOW AND GET FREE SHIPPING
For purchases over 500,- (only valid in DK)
BUY NOW AND GET FREE SHIPPING
For purchases over 500,- (only valid in DK)
 1-2 DELIVERY DAYS
Order before 12 noon and we will ship the same business day
1-2 DELIVERY DAYS
Order before 12 noon and we will ship the same business day
 14 DAY RETURN RIGHT


Out of stock


Free shipping on orders over 500,- in DK

Ships from Roskilde DK

1 year warranty

Local service center


Make your 3D prints more professional with a set of our Knurls and screws.
They are available in either M3 or M4 and have 5 different lengths.
Each set contains 260 and 420 parts respectively, so there is plenty of opportunity to make large projects.
The distribution of the content is:
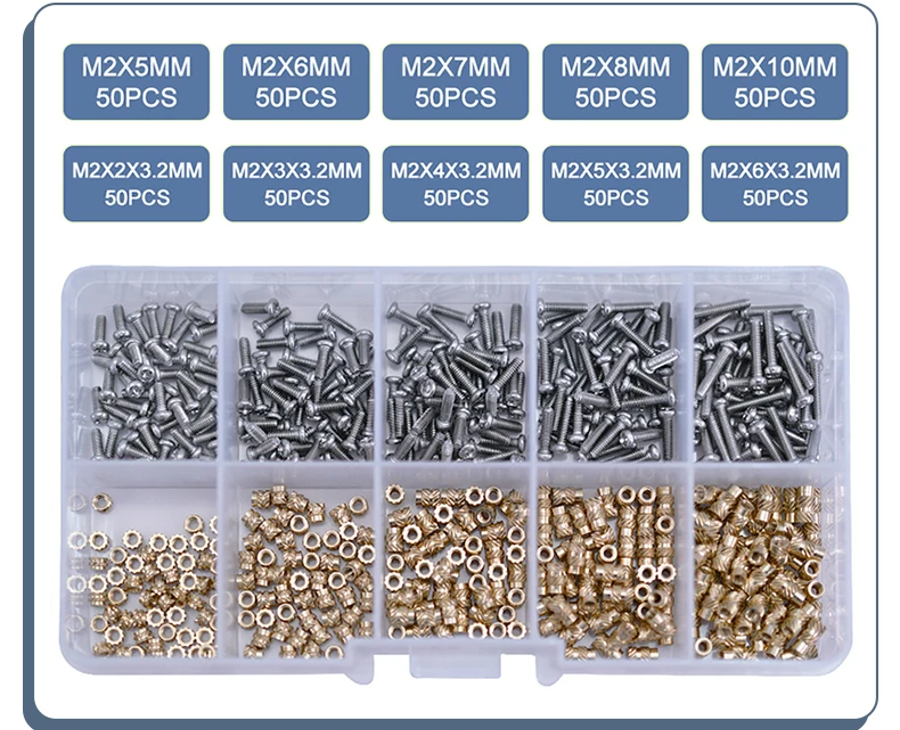
M2:
Screws
50 x 5 mm
50 x 6 mm
50 x 7 mm
50 x 8 mm
50 x 10 mm
Nuts M2 3.2 mm
50 x 2 mm
50 x 3mm
50 x 4 mm
30 x 5 mm
30 x 6 mm
Total 500 parts
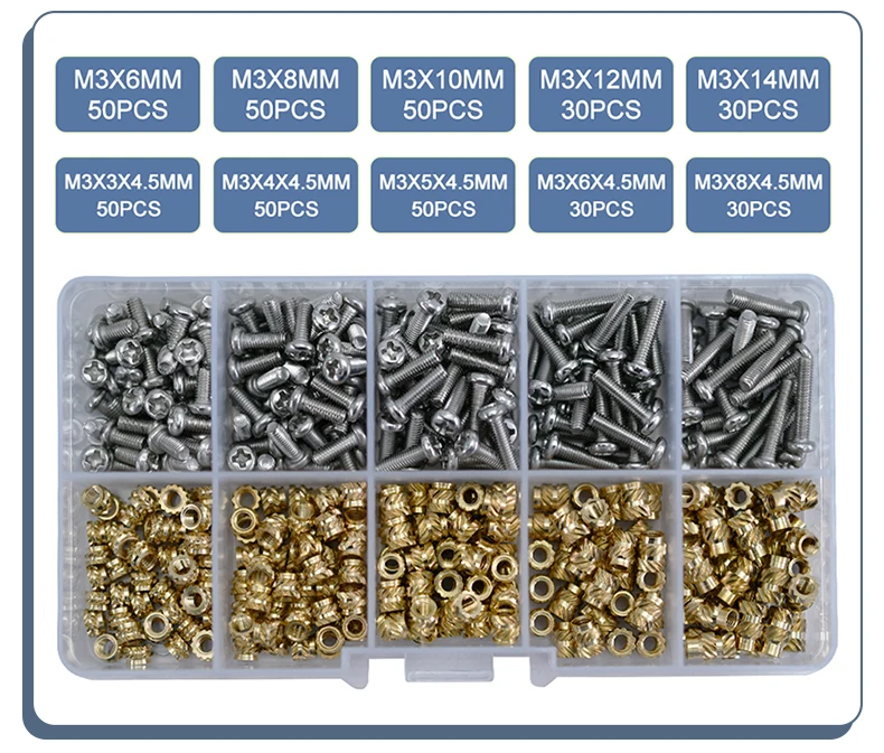
M3:
Screws
50 x 6 mm
50 x 8 mm
50 x 10 mm
30 x 12 mm
30 x 14 mm
Nuts M3 4.5 mm
50 x 3mm
50 x 4 mm
50 x 5 mm
30 x 6 mm
30 x 8 mm
Total 420 parts
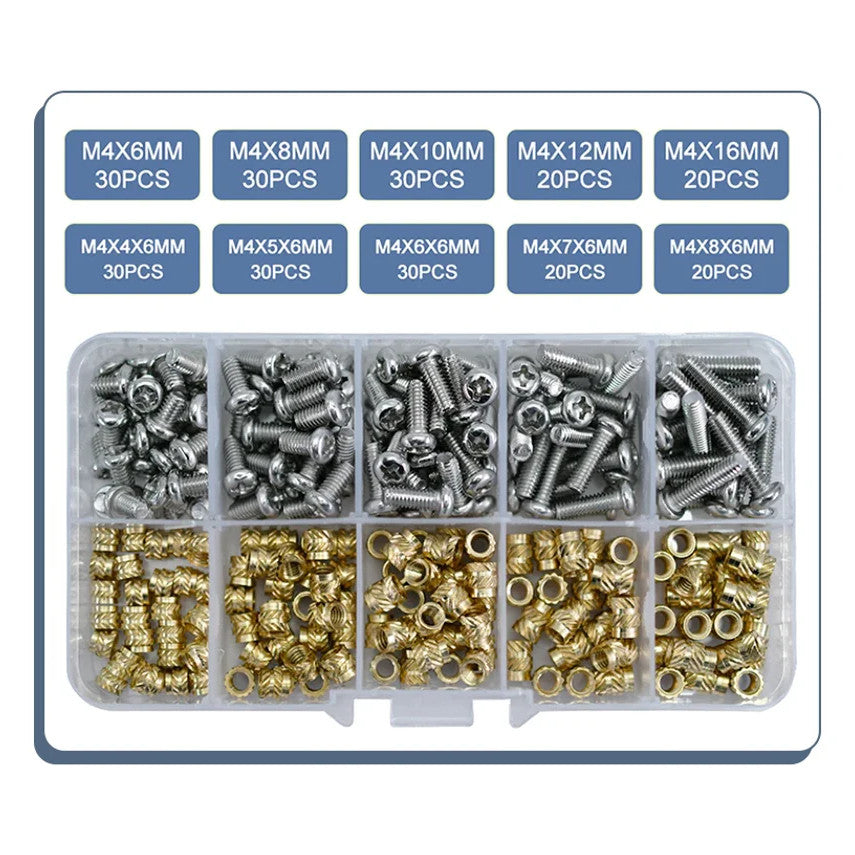
M4:
Screws
30 x 6 mm
30 x 8 mm
30 x 10 mm
20 x 12 mm
20 x 14 mm
Nuts M4 6 mm
30 x 3 mm
30 x 4 mm
30 x 5 mm
30 x 6 mm
30 x 8 mm
Total 260 parts
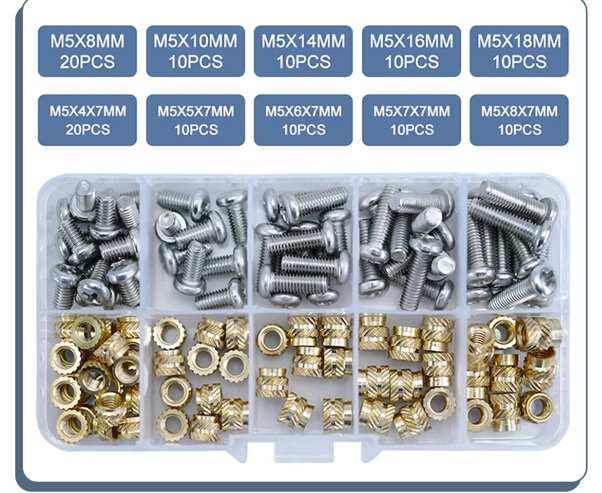
M5:
Screws
20 x 8 mm
10 x 10 mm
10 x 14 mm
10 x 16 mm
10 x 18 mm
Nuts M5 7 mm
20 x 4 mm
10 x 5 mm
10 x 6 mm
10 x 7 mm
10 x 8 mm
Total 120 parts
Threaded nuts can be used for many things, for example: 
But they are also very suitable for assembling 3D prints.
You heat the bolt with a soldering iron and insert it into the printed hole. When the plastic melts and then hardens, the bolt is extremely secure and can be used as a fix point for the bolt.
How are knurled insert nuts used? See a step by step guide here:
-
Prepare your 3D print : Start by designing your 3D print with appropriate holes for your Knurled Insert Nuts. The holes should be slightly smaller than the diameter of your insert nuts to ensure a tight fit.
-
Drill the holes : Use a drill bit that is slightly smaller than the diameter of your insert nut to drill the holes in your 3D print.
-
Heat the insert nut : Heat your insert nut with a soldering iron. This will make it easier to insert it into your 3D print.
-
Insert insert nut : Place your heated insert nut into the pre-drilled hole in your 3D print. Use a soldering iron or similar tool to gently press the insert nut into the hole.
-
Let it cool : Let your 3D print cool before you start screwing it in. This will ensure that the insert nut is firmly anchored in your print.
-
Screw in : Now you can start screwing in your 3D print. Your insert nut will provide a strong, durable thread that can withstand repeated use.
Dimensions of our threaded nuts: 
Dimensions of our bolts: 